
User Guide / Getting started
Find your way around
What's on the dashboard and where everything lives.
Follow the setup list
Get your store ready at the top lists what a new shop should do: upload a logo, complete the profile, set up VAT, add a product, invite staff, print a test receipt and make the first sale. Each row takes you to the right page.
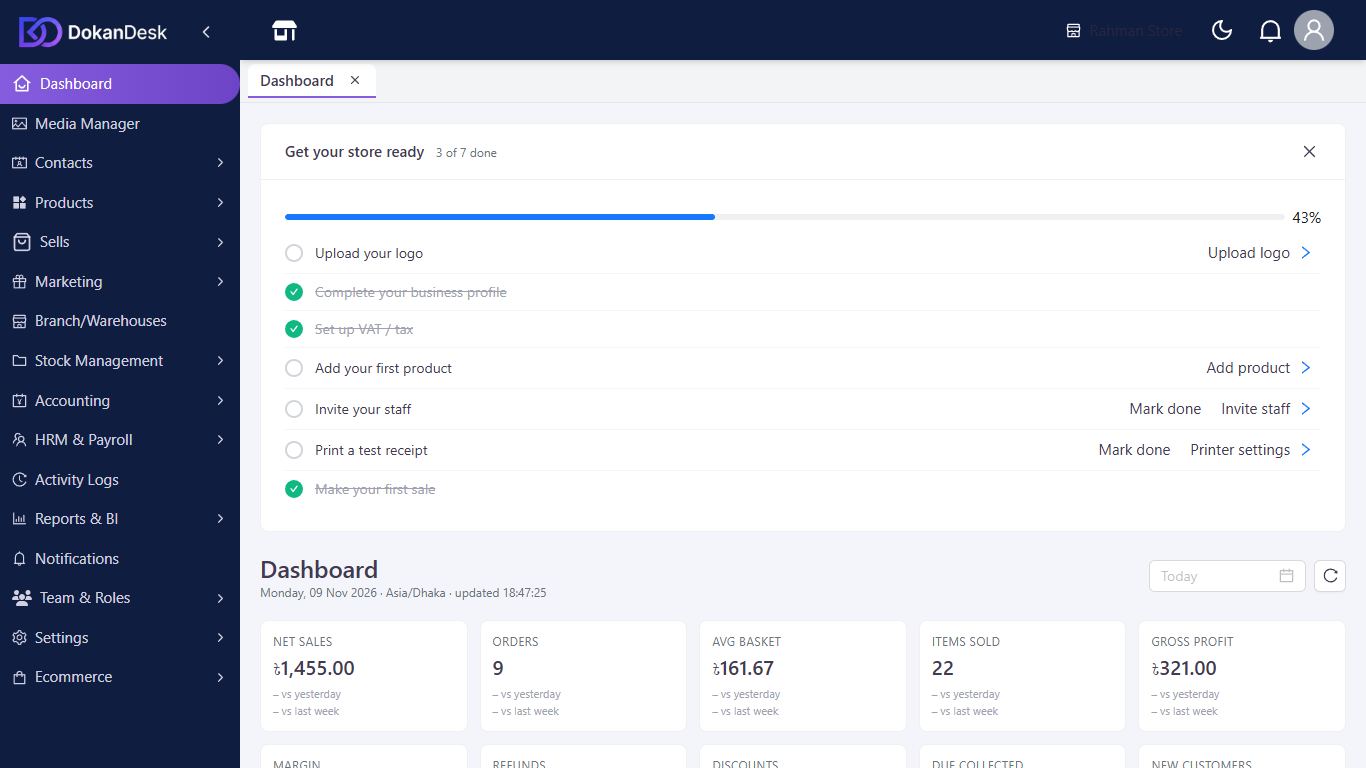
Read today's numbers
Below the list you'll see net sales, orders, profit, refunds and more, each compared with yesterday and last week. Use the date picker to see another day. With more than one branch, choose a branch or All branches.
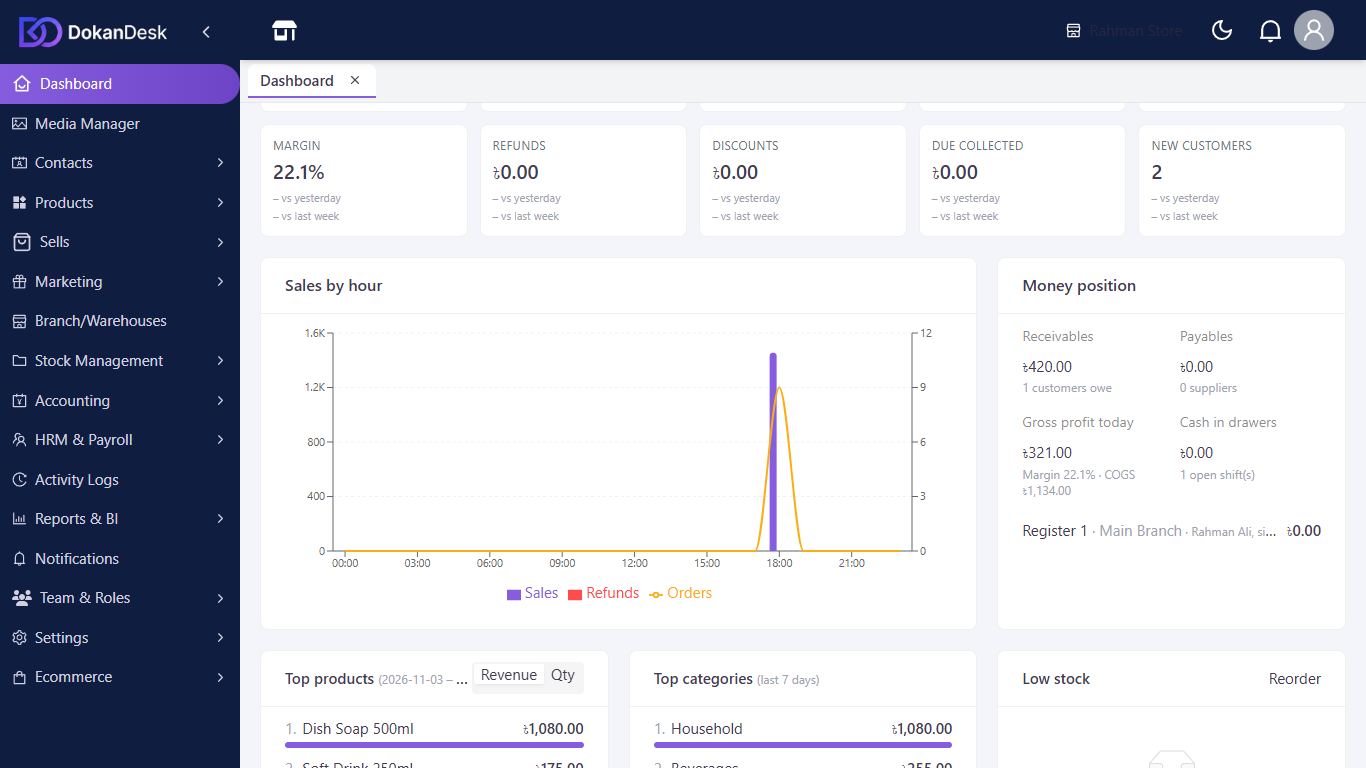
Use the menu on the left
The menu is grouped by work: Contacts, Products, Sells, Marketing, Stock Management, Accounting, HRM & Payroll, Reports & BI, Team & Roles and Settings.
Use the top bar
The shop icon opens the POS. The bell shows notifications. Click your picture for Profile and Logout. If you run more than one store, the store name lets you switch.
Good to know
- People only see the menu items their role allows. A cashier goes straight to the POS.
- Some menu groups only appear if your plan includes them.
Pictures come from a sample shop. Your screen may differ slightly depending on your plan and permissions.
Still stuck? Tell us what happened and we'll help. Contact us