
User Guide / Getting started
Add staff and set what they can do
Invite your team, give each person a role and limit them to their branches.
Open your team
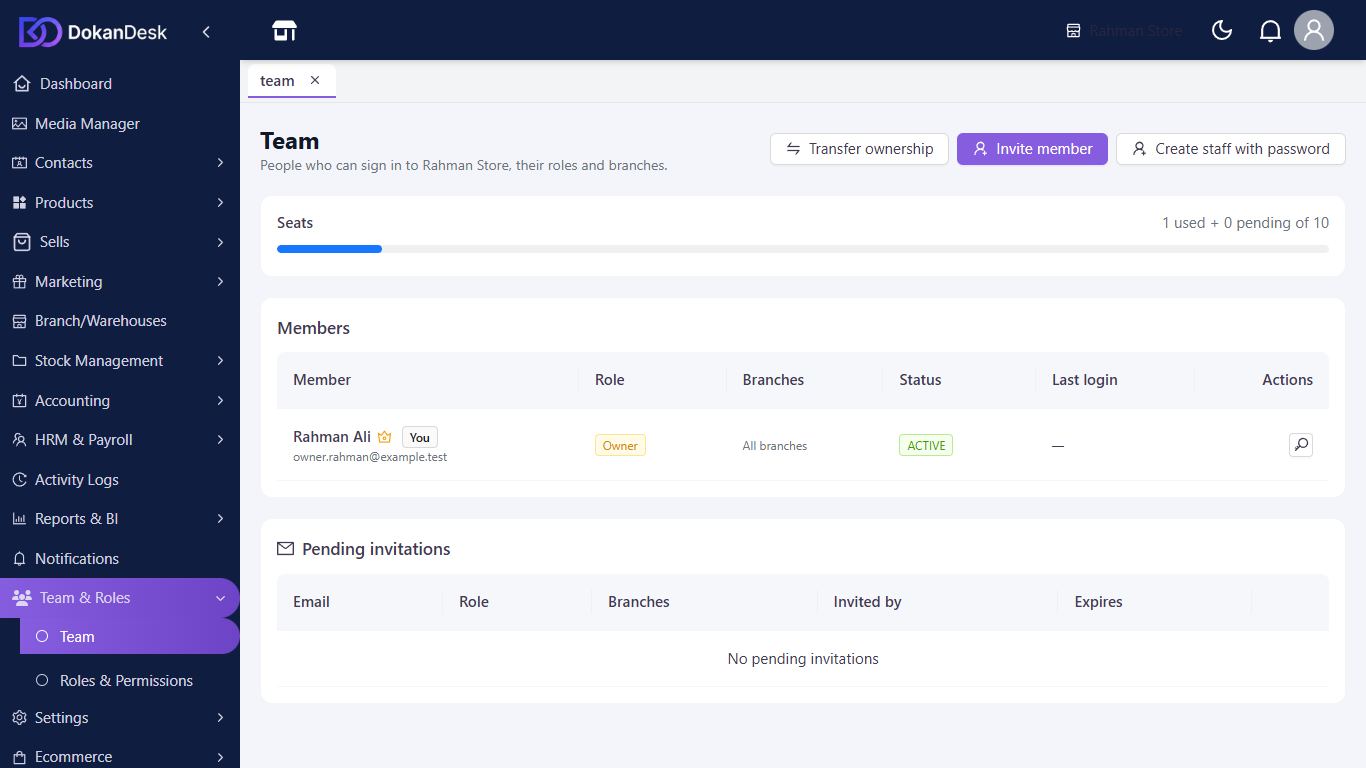
Go to Team & Roles, then Team. Seats shows how many people your plan allows.
Invite by email
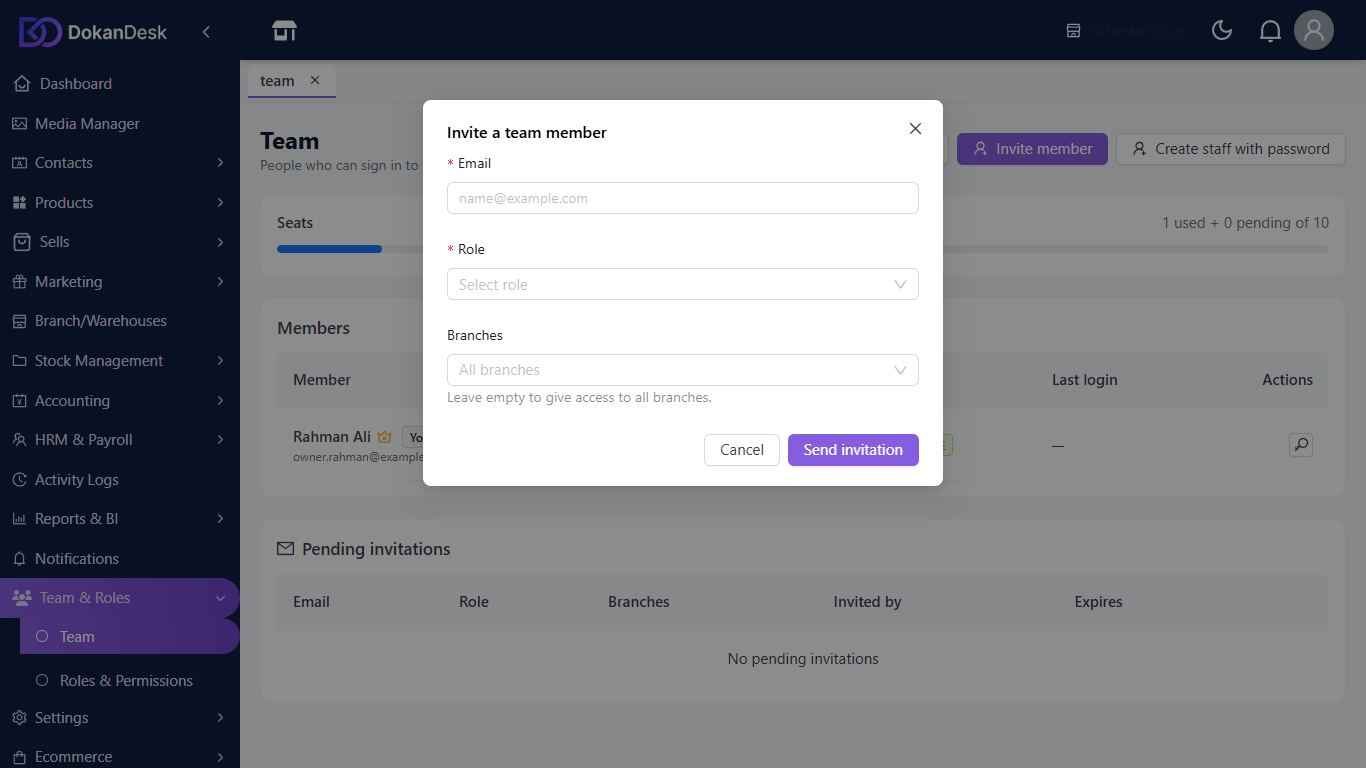
Click Invite member. Enter their Email, choose a Role, and pick Branches, or leave it empty for all branches. Click Send invitation.
They accept the invitation
They open the link in the email, set a name and password, and click Accept invitation. The link stops working after 72 hours, so send a new one if it expires.
Or create the login yourself
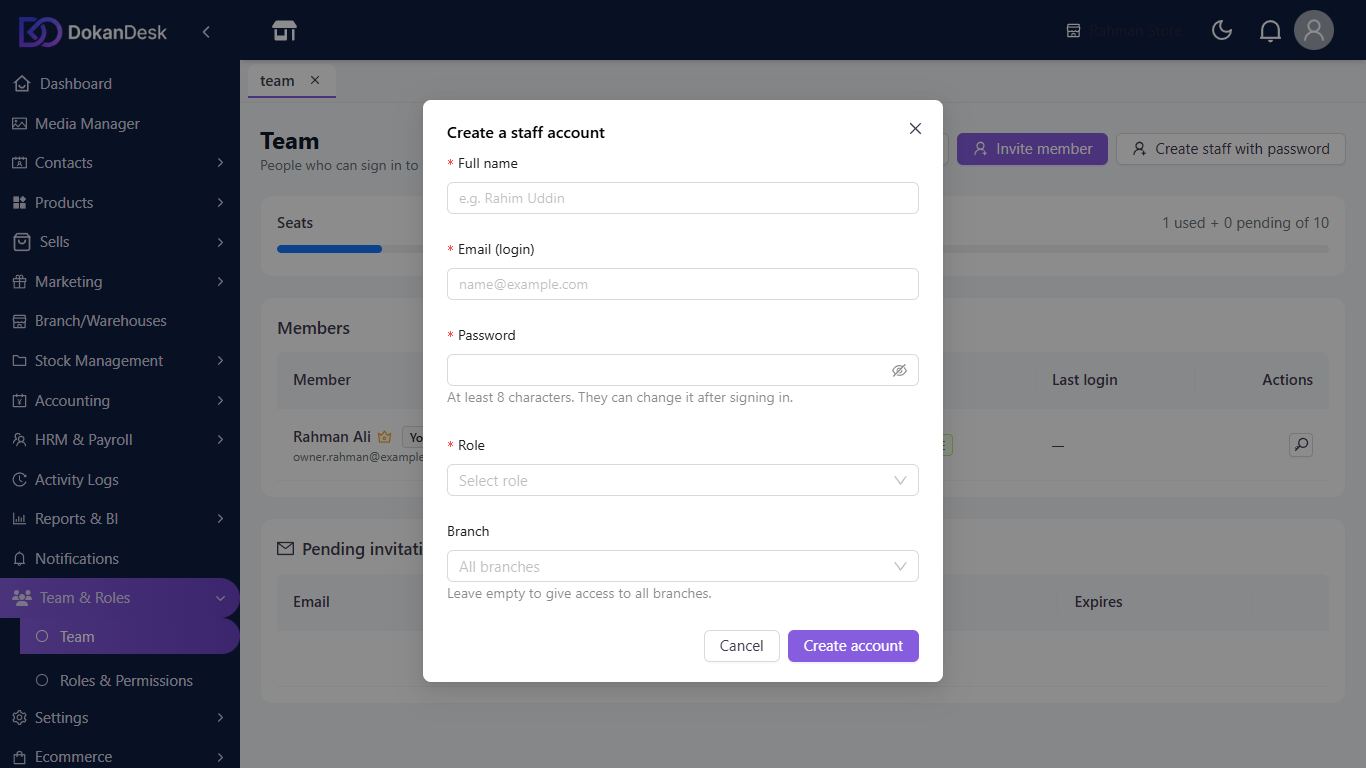
For staff without email access, click Create staff with password. Enter a name, email and password, choose a role, click Create account, and give them the password privately.
Give managers a POS PIN
Click the key icon beside a person, enter a New PIN of 4 to 6 digits and click Save PIN. Managers use this PIN to approve discounts, voids and cash differences at the till.
Make your own role
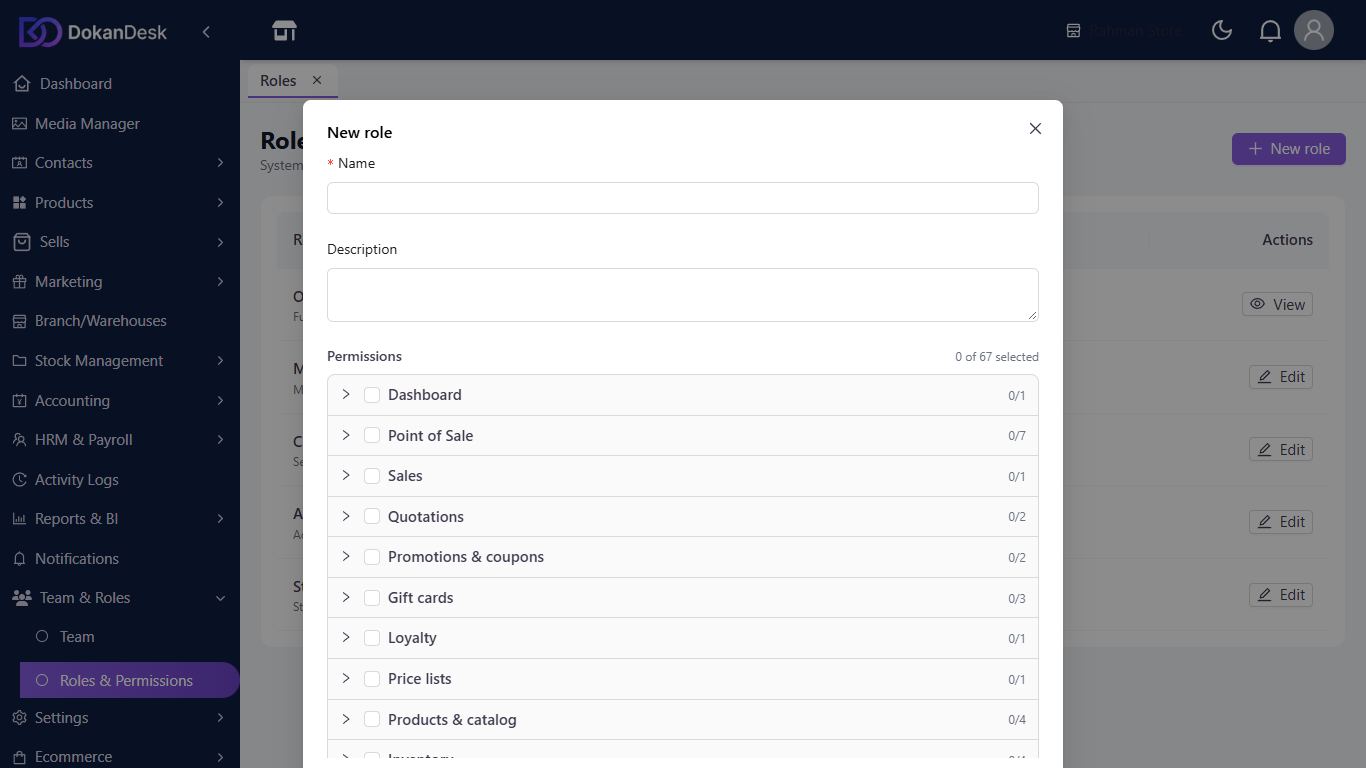
Go to Team & Roles, then Roles & Permissions. Click New role, give it a name, tick what it can do and click Save.
Good to know
- Ready-made roles are Owner, Manager, Cashier, Accountant and Storekeeper.
- A Cashier can't do returns or collect dues unless you add those permissions to the role.
- Set a PIN for every till user. Without one, a locked till can only be left by signing out.
Pictures come from a sample shop. Your screen may differ slightly depending on your plan and permissions.
Still stuck? Tell us what happened and we'll help. Contact us